Archive for February 2009

WVO kit installation (session 3) …

This is the third weekend of work on the WVO conversion.  To recap, we pre-drilled holes before installation of spray-on bed liner the first weekend, we mounted tanks and plumbed coolant to heat exchangers the second weekend.

This weekend we finished plumbing and wiring in the bed, into the fuel system, and under the hood.  We put about 10-gal of diesel #2 in each 60-gal tank.  We built the bracket below so that we could mount the onboard 3-gpm pump to the side of the tanks (between Racor filters).  We ran a spare wire to the bed to power the collection pump.  We plumbed the Pollak 6-port valve into the fuel system.  We installed the six-fuse block and relays under the hood.  We ran electrical into the cab.  We began work on wiring harnesses for the 3 gauge pod (front fuel level, rear fuel level, fuel vacuum).  This was a LONG day because we thought we’d be able to finish.  We called it a night at 3-4AM and figured we’d finish the electrical later.  For now, the factory/diesel side of the Pollak valve is open.

Picture of the custom mounting bracket for the onboard 3-gpm pump:
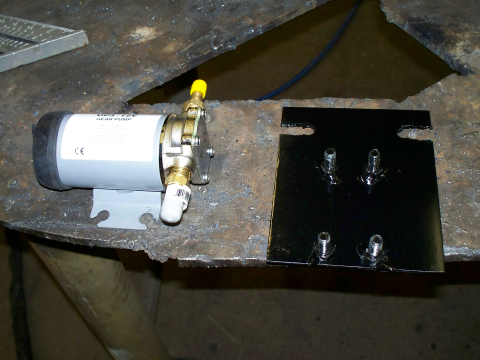
20090121-wvo-pump-bracket

The truck started right up when we were finished.  I only made it about two blocks before the truck died.  We forgot to prime the fuel lines.  I had a vacuum for this, but we simply forgot to use it.  I immediately suspected that air had worked it’s way up to the IP and it wasn’t getting any fuel.  We weren’t able to start it, so we ended up towing it back to the shop and putting it on the charger.  We tried starting it a few times again the next morning to no avail.  I’d crank for 5-7 seconds, then wait about 60 seconds.  Repeated at least 20-30 times.  Put it back on the charger and took a break for lunch.

I sent out an SMS to several farm and truck friends asking for advice.  Several people suggested opening the injector relief valve.  I was unable to locate anything like this.  Instead, I opened the water drain valve on the back of the fuel filter (aka fuel/water separator).  I turned the ignition to start (but not all the way to crank) so that the fuel pump could pressurize the system again.  I opened the valve again.  I could tell that liquid was draining the second time.  After that, the truck started right up but still occassionally stuttered (small air bubbles in system?) so I forced it to idle high (1500-2000) for about 12-15 minutes.  RPM would occasionally drop, but never enough to die since it was idling high.  It was acting pretty normal after about 8-10 minutes, so we called it good.  I had no other issues running off the factory diesel tank after that.

UPDATE:  02/23/2009

I located the hot wires I needed under the dash.  I finished prep work for the gauge wiring harness, labeled gauge and switch wiring.  I left the radio play the whole time .. and the headlights on.  Oops!  I couldn’t start the truck to move it out of the garage because battery was too low.  I jumped the truck, moved it, put it on charger for the night.

UPDATE:  02/24/2009

The truck seemed fully charged and started right up in the morning.  It didn’t start when I tried to leave the office for a lunch meeting, so I got a jump from someone at the business next door.  The truck didn’t start after my lunch meeting either.  We tried to jump it, but weren’t getting a spark at all.  Mike towed me to the repair shop, where they quickly determined that my starter had failed.  Well crap.  Wish I’d known about the relief valve before I worked my starter to death trying to purge air from the fuel system two days ago.  They also confirmed that my batteries had a full charge, which explained the no spark.  You’ll only see a significant spark between batteries if there is a significant difference in chages between the batteries.  It is unlikely that the jump start before lunch actually helped the truck start.
Second weekly Canola WVO pickup …

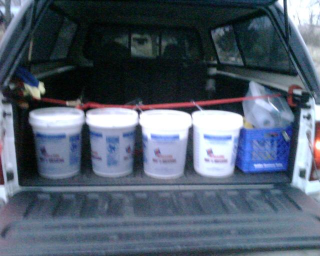
My second weekly pickup of about 11-gal of Canola WVO.  We wasted time pumping WVO from metal buckets to plastic buckets last week.  I just dumped straight from metal buckets to plastic buckets this week.  I’m nervous about the buckets tipping over while riding in the back of the truck, but doubt that my ratchet strips are going to help the issue any.  The coated gloves are very helpful since their metal bucket handles are usually pretty oily.  I just have to be sure to use a paper towel to wipe up any mess on my tailgate or the handle for the back door leading into the kitchen.

20090217-wvo-pickup

UPDATE: 03/27/2009

My blending friend is still letting me pickup WVO from this source since he doesn’t blend during the colder months.  The location is very close to my house, so it works well even though they require weekly pickup and their volume is pretty low.  Their WVO volume varies from week to week, but I think they know how we are using the oil and are consciously keep fryer oil separate from the rest of the grease.  Some buckets are full of grill grease, so I drive them to their grease container.  The least I can do for a little bit of free fuel.  Otherwise, they’d have to carry them about 1 city block to the container because of the layout of their facility.

My first WVO collection …

After learning that a friend was blending 75/25 WVO with #2 in his factory tank, he gave me a 5gal sample of oil from his source.  That isn’t going to get me very far, so I need to start working on a permanent source of my own.

I got permission to go to one of the local restaurants to pickup enough WVO to get me started.  A friend went with me and filmed the whole thing since this was my first WVO collection on Friday 02/06.  I pumped about 12gal back into two of the original 35# containers and into one half sized container.

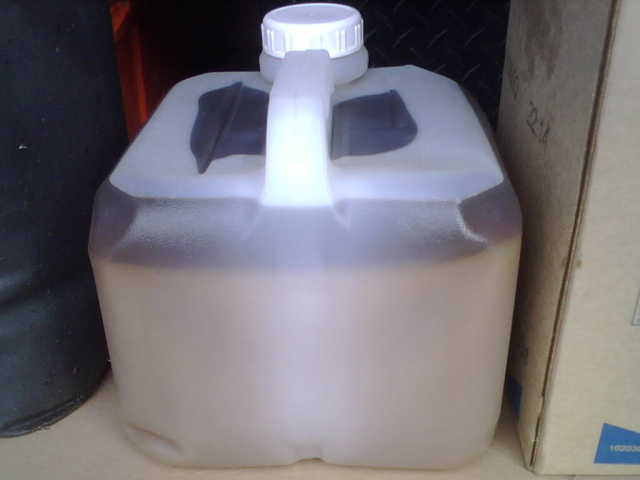
You can see how this stuff is settling out after about 48 hours (as of Sun 02/08).  The cubie/box to the right contains more of this pumped oil that I am settling.  I will later learn that the container to the left (the 5gal sample from my blending friend) is Zero Trans Fat Canola oil that is poured from kitchen fryers into buckets, then from buckets into these containers.

20090208-wvo-48-hours

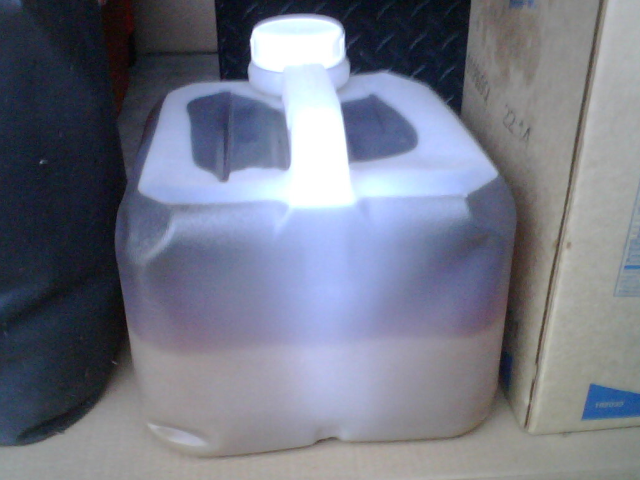
Here’s another picture after 96 hours (as of Tues 02/10).  As per the ingredients listed on the original container to the right, this sample is a mix combination of Soybean Vegetable Oil and Hydrogenated Soybean Vegetable Oil.  I’m assuming the dark oil on top is the vegetable oil and the light/creamy oil on the bottom is the hydrogenated vegetable oil mixed with water, fats, etc.  I might be able to use the dark oil, but have my reservations about using the bottom half.

20090210-wvo-96-hours

UPDATE: I’ve left these samples sit for about 4 weeks and ended up with about 50/50 mix of dark and light oil.  I’ve been told that I can safely run this oil through my truck after I heat and filter the oil.  I’m collecting very clean Canola oil before it leaves a kitchen now, so I’m pretty nervous about this stuff.  Maybe filter and run the dark half?  We’ll see.

Preparing for my first WVO collection …

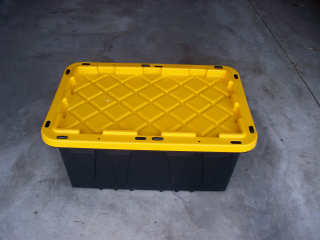
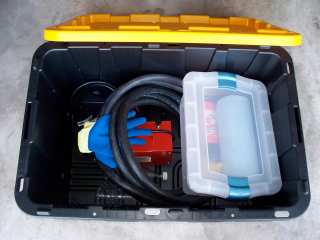
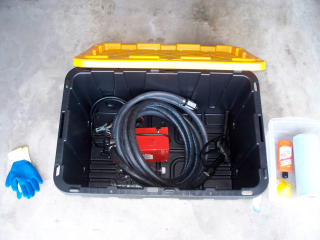
I’ve put together a portable kit for WVO collection.  I found the coated work gloves, orange cleaner, shop towels, large container, and small container at Lowe’s or Home Depot.  The large container holds the pump, gloves, and small container.  The small container holds clean items such as the shop towels, work gloves.

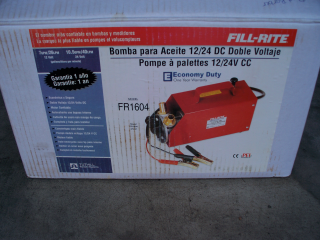
Close-up picture of the box for the 7gpm pump (Fill-Rite FR1604).

20090206-wvo-collection-pump-1

Container packed and ready to go.

20090206-wvo-collection-pump-2

Inside view of container.  Gloves, Pump, Clean Container fit nicely.

20090206-wvo-collection-pump-3

Unpacked view of container.  Pump fits nicely.  Ridges in bottom of container can collect small amounts of loose WVO.

20090206-wvo-collection-pump-4

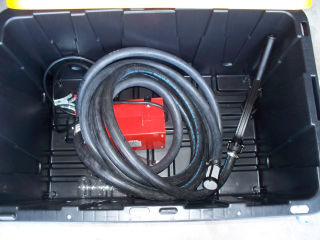
Close-up of pump in container.  The key is to point end of hoses upward so that they do not drain into container while in storage.

20090206-wvo-collection-pump-5

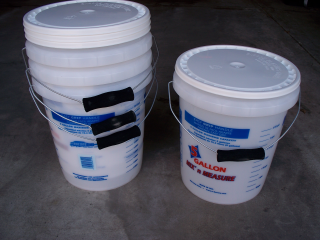
My somewhat transparent collection buckets from Lowe’s.  These are 5-gal paint mixing buckets with gallon and liter measurements on the side.  They are a spendy $7-8 per bucket with lid when compared to about $3 each for the white Tractor and Supply buckets I had also considered.  I haven’t been able to find any semi-transparent containers with measurement marks anywhere else (yet).  These are very handy for transport, settling and recording volume collected.  Comment if you have a source for something similar.

20090206-wvo-collection-pump-6

UPDATE: 03/27/2009

I have been using these buckets every week.  I am able to dump fresh fryer oil from metal buckets in the kitchen into these buckets.

I’m glad this pump isn’t mounted permenantly in my truck.  I have been using the pump to transfer from these buckets into a sock/bag filter that I put in the top of my 275-gal IBC container.  I just pump a little bit at a time and let the filter drain before pumping again.  I processed the first 6 weekly pickups by letting these buckets settle for 5-6 days, then heating and stirring these buckets, then pumping into the bag filter.

I stopped heating and stirring the last few weekly pickups because I started thinking that all the heat and stirring was cancelling out some of the settling that had occurred.  I am now pumping room temperature (55-65 F) oil into the bag filter and consolidating the bottom gallon of each container into a single container for another week of settling.  Skipping the heating has slowed down filtering a little but will hopefully extend the life of my filter bags.  For some, skipping the heating step may also prevent them from separating water from their oil?  I am not concerning myself with this since the oil is coming directly from the fryers.  As a side note, I am having to use a spatchula to scrape the settled sediment from the bottom of these buckets every few weeks.  I’m probably accumulating 1/8″ to 1/4″ of sediment in each bucket every 3-4 weeks, or about 2 quarts (total) every 3-4 weeks.  The top has a consistency of chocolate syrup, while the deeper stuff has a consistency of fudge.  No unpleasant smell, just dirty work.

I also use the pump to transfer from the 275-gal IBC into my rear onboard tank.  I am not pumping anything “dirty” directly into the rear onboard tank yet.  Everything is filtered into the IBC for now.  If I have used the pump with unfiltered oil, I begin by pumping about 3-4 gal from the IBC into a container that will be run back through the filter bag into the IBC.  By doing this, I hope to purge any unfiltered oil from my pump and hoses.