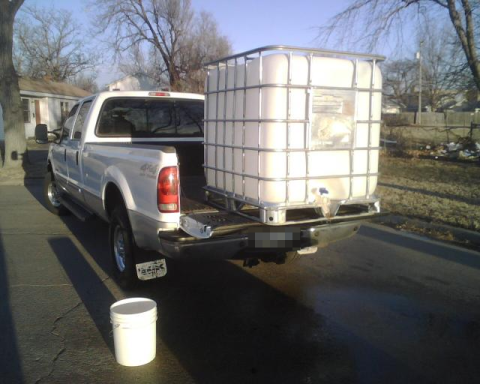
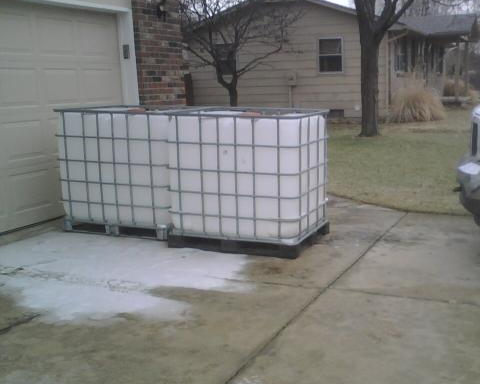
First “long distance” WVO trip …

Ran the truck on a 90/10 mix of heated WVO and Diesel #2 for a majority of a 600 mile round-trip family visit this weekend.  Things seem to be working very well.  I only have three concerns:

Fuel Efficiency – I’m suspecting a slightly lower MPG on WVO than on Diesel #2.  I won’t be able to confirm until I buy a flow-meter for use when filling the truck with WVO or until I establish enough long-term ballpark figures to look at averages.

Fuel Leak – I’m suspecting a WVO fuel leak.  I’ve noticed large light-colored puddles when I pull out of several driveways now, but haven’t been able to determine the source.  On a side note, the dealership replaced my ICP sensor and CAC hoses to resolve my motor oil leak when I had the truck in for a 5K oil change on 03/18.  I’ve considered that this could be an even worse motor oil leak than before, and that the motor oil is very light in color because it was recently changed, but doubt the motor oil would be that light unless they used different oil this time.

Performance Concerns – Could just be me, but it seems like the truck is running rough when accelerating through specific speeds somewhere between 35 and 55 MPH.  I haven’t nailed down more specifics yet, just feel like something doesn’t seem right.

UPDATE:  03/25/2009

I’m still worried about performance concerns, but am starting to think this is either in my head or only occurs while running on WVO.  I’ve run on Diesel #2 several times and don’t seem to experience the problem.  I’m wondering if this has to do with a cylinder compression issue or maybe injector timing (ie: cetane related).  I’d like to begin running compression tests on each cylinder every 5K so that I can monitor degredation (if any) over time.  Harbor Freight has a compression testing kit for $25, but not sure if it would be able to test a 7.3L PSD.  I’d also like to invest in some PC-based diag and tuning software so that I can spot problems and possibly even fine tune injection timing for WVO.  I’m also considering mixing WVO (low cetane value) with B100 (high cetane value) so that it burns similar to ULSD.

Approximate Cetane levels for Diesel, WVO, and B100 (from Journey to Forever):

  • Diesel 45
  • Canola Oil 40-50
  • BioDiesel 45-65

I suspect that the stuttering that I feel at different points during acceleration is related to a low Cetane level in my WVO.  It sounds like performance can suffer with extremely low Cetane levels (below 40), and performance plateaus once you hit about 50.

Paying Road-Tax and Use-Tax for WVO in Kansas …

I am trying to figure out how to pay necessary road-tax and use-tax for WVO as a Kansas resident.  I’ve been tracking consumption so that I can begin reporting this.  It sounds like Federal taxes will be 24.4c/gal and State taxes will be 26.0c/gal. My consumption for approx 19 gallons in 02/2009 would cost $9.58, but I can’t send in a payment until I complete several applications.

Federal – It seems I need to complete IRS Form 637 (Application for Registration for Certain Excise Tax Activities) with activities “AL” and “AM” first.  Once approved, I would complete IRS Form 720 (Quarterly Federal Excise Tax Return) and submit the form with payment shortly after the end of each quarter.

State of Kansas – I assume I need to register with the state before I can pay use tax, but I haven’t determined how to do this yet.  Once registered, I would complete Kansas Form MF-54 (Producer/Manufacturer, Blender, End Consumer Motor Fuel Tax Report) and submit the form with payment shortly after the end of each month.

Several online discussions lead me to believe I can qualify for the IRS 50c/gal to $1/gal credit for the sale of SVO as a bio-fuel.  My understanding is that this must be performed by a company, not an individual.  I’m working to establish a company that can handle collection, record keeping and filtering of all the WVO for several of us who are needing WVO.  We would probably need to buy WVO from the company at some minimal per gallon rate.  The train of thought is that the credits should cancel out the road tax and keep everything on the up and up.  I’m expecting a lot of local public exposure and need to have this issue under control.  Will post updates as I make progress on this.  Will continue to record consumption in the meantime so that I can settle up when I am allowed to begin making payments.

WVO kit installation (session 3) …

This is the third weekend of work on the WVO conversion.  To recap, we pre-drilled holes before installation of spray-on bed liner the first weekend, we mounted tanks and plumbed coolant to heat exchangers the second weekend.

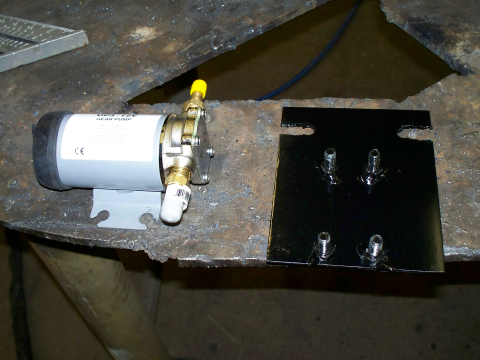
This weekend we finished plumbing and wiring in the bed, into the fuel system, and under the hood.  We put about 10-gal of diesel #2 in each 60-gal tank.  We built the bracket below so that we could mount the onboard 3-gpm pump to the side of the tanks (between Racor filters).  We ran a spare wire to the bed to power the collection pump.  We plumbed the Pollak 6-port valve into the fuel system.  We installed the six-fuse block and relays under the hood.  We ran electrical into the cab.  We began work on wiring harnesses for the 3 gauge pod (front fuel level, rear fuel level, fuel vacuum).  This was a LONG day because we thought we’d be able to finish.  We called it a night at 3-4AM and figured we’d finish the electrical later.  For now, the factory/diesel side of the Pollak valve is open.

Picture of the custom mounting bracket for the onboard 3-gpm pump:

20090121-wvo-pump-bracket

The truck started right up when we were finished.  I only made it about two blocks before the truck died.  We forgot to prime the fuel lines.  I had a vacuum for this, but we simply forgot to use it.  I immediately suspected that air had worked it’s way up to the IP and it wasn’t getting any fuel.  We weren’t able to start it, so we ended up towing it back to the shop and putting it on the charger.  We tried starting it a few times again the next morning to no avail.  I’d crank for 5-7 seconds, then wait about 60 seconds.  Repeated at least 20-30 times.  Put it back on the charger and took a break for lunch.

I sent out an SMS to several farm and truck friends asking for advice.  Several people suggested opening the injector relief valve.  I was unable to locate anything like this.  Instead, I opened the water drain valve on the back of the fuel filter (aka fuel/water separator).  I turned the ignition to start (but not all the way to crank) so that the fuel pump could pressurize the system again.  I opened the valve again.  I could tell that liquid was draining the second time.  After that, the truck started right up but still occassionally stuttered (small air bubbles in system?) so I forced it to idle high (1500-2000) for about 12-15 minutes.  RPM would occasionally drop, but never enough to die since it was idling high.  It was acting pretty normal after about 8-10 minutes, so we called it good.  I had no other issues running off the factory diesel tank after that.

UPDATE:  02/23/2009

I located the hot wires I needed under the dash.  I finished prep work for the gauge wiring harness, labeled gauge and switch wiring.  I left the radio play the whole time .. and the headlights on.  Oops!  I couldn’t start the truck to move it out of the garage because battery was too low.  I jumped the truck, moved it, put it on charger for the night.

UPDATE:  02/24/2009

The truck seemed fully charged and started right up in the morning.  It didn’t start when I tried to leave the office for a lunch meeting, so I got a jump from someone at the business next door.  The truck didn’t start after my lunch meeting either.  We tried to jump it, but weren’t getting a spark at all.  Mike towed me to the repair shop, where they quickly determined that my starter had failed.  Well crap.  Wish I’d known about the relief valve before I worked my starter to death trying to purge air from the fuel system two days ago.  They also confirmed that my batteries had a full charge, which explained the no spark.  You’ll only see a significant spark between batteries if there is a significant difference in chages between the batteries.  It is unlikely that the jump start before lunch actually helped the truck start.

Second weekly Canola WVO pickup …

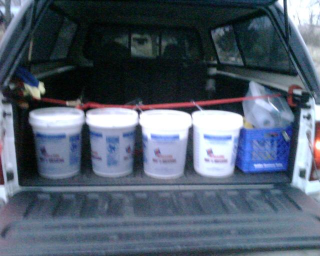
My second weekly pickup of about 11-gal of Canola WVO.  We wasted time pumping WVO from metal buckets to plastic buckets last week.  I just dumped straight from metal buckets to plastic buckets this week.  I’m nervous about the buckets tipping over while riding in the back of the truck, but doubt that my ratchet strips are going to help the issue any.  The coated gloves are very helpful since their metal bucket handles are usually pretty oily.  I just have to be sure to use a paper towel to wipe up any mess on my tailgate or the handle for the back door leading into the kitchen.

20090217-wvo-pickup

UPDATE: 03/27/2009

My blending friend is still letting me pickup WVO from this source since he doesn’t blend during the colder months.  The location is very close to my house, so it works well even though they require weekly pickup and their volume is pretty low.  Their WVO volume varies from week to week, but I think they know how we are using the oil and are consciously keep fryer oil separate from the rest of the grease.  Some buckets are full of grill grease, so I drive them to their grease container.  The least I can do for a little bit of free fuel.  Otherwise, they’d have to carry them about 1 city block to the container because of the layout of their facility.

My first WVO collection …

After learning that a friend was blending 75/25 WVO with #2 in his factory tank, he gave me a 5gal sample of oil from his source.  That isn’t going to get me very far, so I need to start working on a permanent source of my own.

I got permission to go to one of the local restaurants to pickup enough WVO to get me started.  A friend went with me and filmed the whole thing since this was my first WVO collection on Friday 02/06.  I pumped about 12gal back into two of the original 35# containers and into one half sized container.

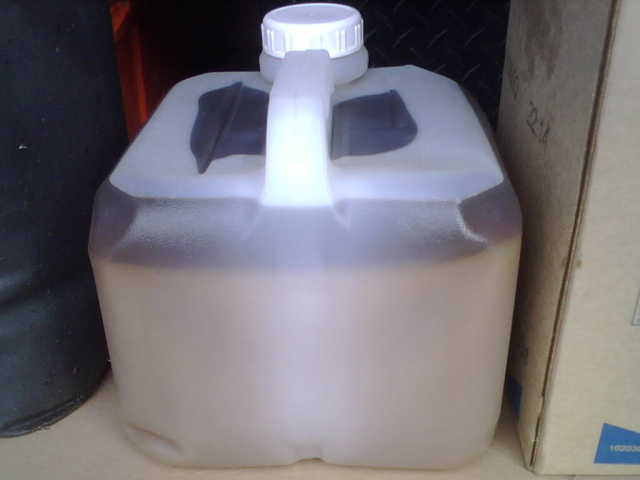
You can see how this stuff is settling out after about 48 hours (as of Sun 02/08).  The cubie/box to the right contains more of this pumped oil that I am settling.  I will later learn that the container to the left (the 5gal sample from my blending friend) is Zero Trans Fat Canola oil that is poured from kitchen fryers into buckets, then from buckets into these containers.

20090208-wvo-48-hours

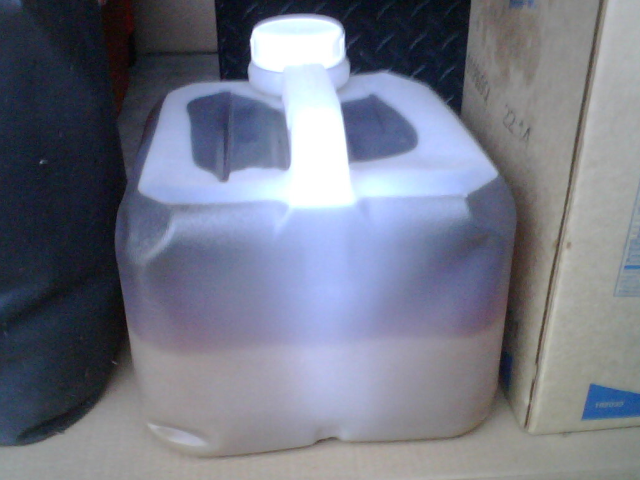
Here’s another picture after 96 hours (as of Tues 02/10).  As per the ingredients listed on the original container to the right, this sample is a mix combination of Soybean Vegetable Oil and Hydrogenated Soybean Vegetable Oil.  I’m assuming the dark oil on top is the vegetable oil and the light/creamy oil on the bottom is the hydrogenated vegetable oil mixed with water, fats, etc.  I might be able to use the dark oil, but have my reservations about using the bottom half.

20090210-wvo-96-hours

UPDATE: I’ve left these samples sit for about 4 weeks and ended up with about 50/50 mix of dark and light oil.  I’ve been told that I can safely run this oil through my truck after I heat and filter the oil.  I’m collecting very clean Canola oil before it leaves a kitchen now, so I’m pretty nervous about this stuff.  Maybe filter and run the dark half?  We’ll see.

Preparing for my first WVO collection …

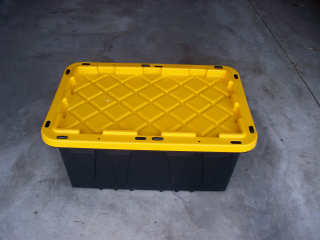
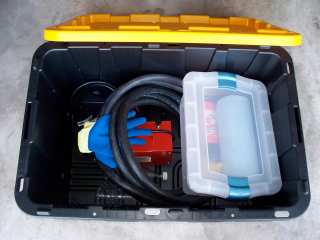
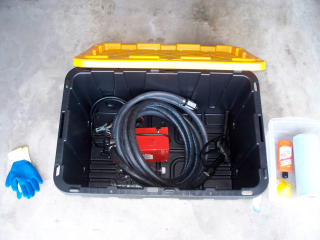
I’ve put together a portable kit for WVO collection.  I found the coated work gloves, orange cleaner, shop towels, large container, and small container at Lowe’s or Home Depot.  The large container holds the pump, gloves, and small container.  The small container holds clean items such as the shop towels, work gloves.

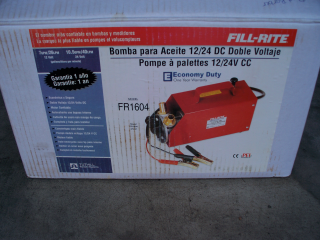
Close-up picture of the box for the 7gpm pump (Fill-Rite FR1604).

20090206-wvo-collection-pump-1

Container packed and ready to go.

20090206-wvo-collection-pump-2

Inside view of container.  Gloves, Pump, Clean Container fit nicely.

20090206-wvo-collection-pump-3

Unpacked view of container.  Pump fits nicely.  Ridges in bottom of container can collect small amounts of loose WVO.

20090206-wvo-collection-pump-4

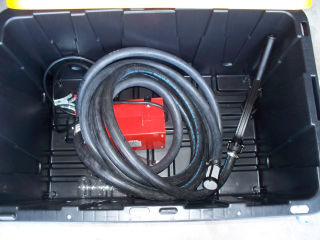
Close-up of pump in container.  The key is to point end of hoses upward so that they do not drain into container while in storage.

20090206-wvo-collection-pump-5

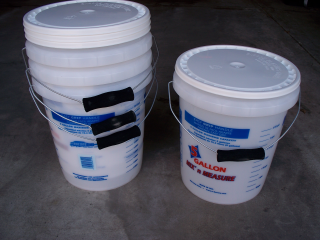
My somewhat transparent collection buckets from Lowe’s.  These are 5-gal paint mixing buckets with gallon and liter measurements on the side.  They are a spendy $7-8 per bucket with lid when compared to about $3 each for the white Tractor and Supply buckets I had also considered.  I haven’t been able to find any semi-transparent containers with measurement marks anywhere else (yet).  These are very handy for transport, settling and recording volume collected.  Comment if you have a source for something similar.

20090206-wvo-collection-pump-6

UPDATE: 03/27/2009

I have been using these buckets every week.  I am able to dump fresh fryer oil from metal buckets in the kitchen into these buckets.

I’m glad this pump isn’t mounted permenantly in my truck.  I have been using the pump to transfer from these buckets into a sock/bag filter that I put in the top of my 275-gal IBC container.  I just pump a little bit at a time and let the filter drain before pumping again.  I processed the first 6 weekly pickups by letting these buckets settle for 5-6 days, then heating and stirring these buckets, then pumping into the bag filter.

I stopped heating and stirring the last few weekly pickups because I started thinking that all the heat and stirring was cancelling out some of the settling that had occurred.  I am now pumping room temperature (55-65 F) oil into the bag filter and consolidating the bottom gallon of each container into a single container for another week of settling.  Skipping the heating has slowed down filtering a little but will hopefully extend the life of my filter bags.  For some, skipping the heating step may also prevent them from separating water from their oil?  I am not concerning myself with this since the oil is coming directly from the fryers.  As a side note, I am having to use a spatchula to scrape the settled sediment from the bottom of these buckets every few weeks.  I’m probably accumulating 1/8″ to 1/4″ of sediment in each bucket every 3-4 weeks, or about 2 quarts (total) every 3-4 weeks.  The top has a consistency of chocolate syrup, while the deeper stuff has a consistency of fudge.  No unpleasant smell, just dirty work.

I also use the pump to transfer from the 275-gal IBC into my rear onboard tank.  I am not pumping anything “dirty” directly into the rear onboard tank yet.  Everything is filtered into the IBC for now.  If I have used the pump with unfiltered oil, I begin by pumping about 3-4 gal from the IBC into a container that will be run back through the filter bag into the IBC.  By doing this, I hope to purge any unfiltered oil from my pump and hoses.

WVO kit installation (session 2) …

The spray-on bed liner was installed this week, so we were ready to begin some real work on the conversion this weekend.

We mounted the pair of 60-gal Trekker tanks.  We ran the Parker 3B hose from the tanks up to the engine compartment.  We separated the fuel line from the rest of the lines near the fuel pump.  (UPDATE:  We should have separated the fuel line a little further back, because we ended up mounting the 6-port Pollak valve on the frame between the fuel tank and the transmission support/mount.  We thought we were going to be able to mount the valve right by the fuel pump, but just couldn’t figure out how to make it fit.   I ended up separating the fuel hose from the other hoses by hand, but that was a lot more time consuming since the 3B hose was already in position.)  We separated the electrical lines from the coolant lines when the hose entered the engine compartment.  We ran the pair of coolant lines above the engine to the passenger side of the engine compartment and kept them wrapped in the sheath.

We cut the coolant lines going to/from the heater core and installed each “T” and connected each coolant line.  We determined which line was the “source” and which was the “return” by running both lines into a bucket in the bed and waiting for coolant to come out of one of the lines.  We connected the “source” to the front/clean tank and connected the “return” to the rear/dirty tank.  We had to add about 1/2-gal of coolant right away.  In the end, I probably added a total of 1 gallon of 50/50 universal coolant.

UPDATE:

If I were to do this again, I’d want to be 100% sure that I knew where we were mounting the 6-port valve.  Everything else went pretty smoothly.  Having pictures that show where to run the 3B hose would have probably cut down on planning/thinking, though we managed fine on our own with a little extra time.  It would have also been nice to know that it can take a good 10 minutes for the truck to fill the entire length of the “source” coolant hose going back to the bed/tanks.  We were worried that something was wrong when we weren’t seeing any coolant back there after 4-5 minutes.

WVO storage containers …

I haven’t had time to finish the GFS kit installation, but have been thinking about WVO collection and storage.

I happened across this pair of 275gal IBC forkable poly totes while driving to a friend’s house outside of town.  They were sitting in someone’s yard near the road with a for sale sign.  These were used to store some sort of soap in a previous lifetime.  I was only looking for one IBC, but couldn’t believe the price so I bought both thinking that I could give one to my restaurant owner friend.  He declined, so I ended up flipping the spare for a profit on Craig’s List.

Rinsing out totes.  They were fairly clean already, so this was mostly a matter of draining the water.

20090122-wvo-tote

Pair of nice clean totes, waiting for a home.  One will end up in the garage.  The other will end up on Craig’s List.

20090128-wvo-totes

WVO kit installation (session 1) …

Preparing truck bed for WVO tank installation …

I’ve decided to replace the drop-in bed liner with a spray-on bed liner before we mount the GFS tanks in the bed.  This weekend we took inventory of all the items received from Bud and GFS.

I’ve been told that there are no really good local Rhino Liner installers, so opted to go with the local Line-X folks.  They took a look at the truck while the drop-in liner was present and gave me a quote.  Since they couldn’t take a look at the entire bed because of the drop-in bed liner, they warned that large amounts of rust could drive up the price and said that sanding down the rust and treating the areas with self-etching primer could cut down on costs.  We planned to work on the rust this weekend, but were pleasantly surprised that rusting was fairly minimal so we just drilled necessary holes for tank mounting, filter draining, and the fuel/coolant/electrical lines.

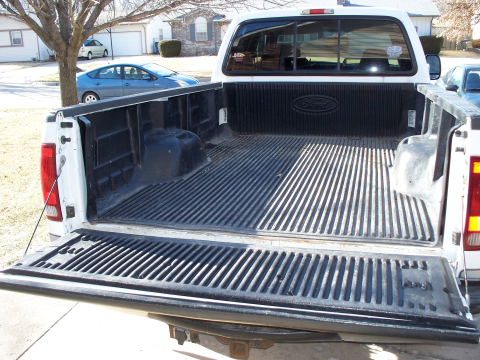
Truck bed with the drop-in bed liner.
20090118-truck-bed-liner

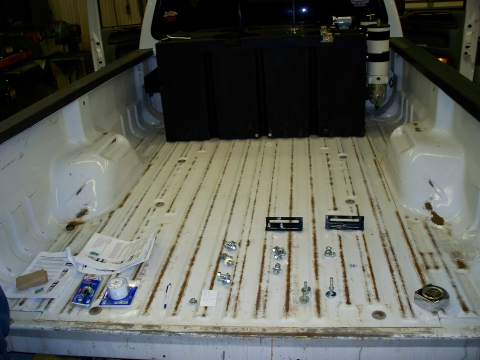
Truck bed without liner.  Tanks are in position.  Marking holes to be drilled.
20090118-truck-bed-no-liner

My body shop friend took my drop-in bed liner.  Sounds like he will be able to use the liner in his truck.  If not, told him they were welcome to use it for anything.  I was just glad to see it go to use.  If he didn’t need it, I would have listed it on CL.  No reason to store it.  Better than cutting it up and throwing it in the garbage!

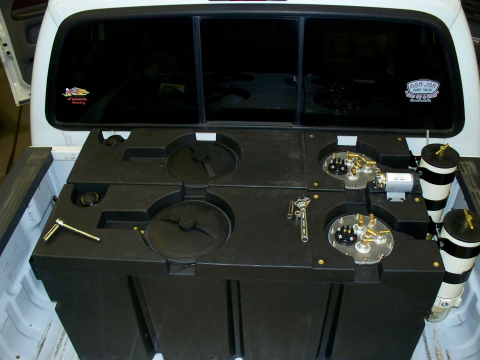
Top view of dual 60 gal Trekker tanks.  GFS recommends mounting these with the filters on the driver’s side, but what do they know.  It’s not like they’ve been doing this for 8 years or anything.  I want to be able to do all of my filling on the driver’s side.  You can see a fuel fill port near the far left edge of each tank, a larger access port (for cleaning, etc?) near the center of each tank, and a custom-built mount for the heat exchangers, fuel pickups, and fuel fill ports (2 per tank), and fuel sending units on each tank.  The Racor 1000 filters are mounted on the passenger side.

UPDATE:  I later decided that I’m glad all the fill ports are on the driver’s side, but wish we had drilled the mount holes for the tanks maybe one more ridge to the left.  The extra few inches would have allowed for easier access to the drain bowls on the bottom of the Racor 1000 heated filters.  I can blindly drain samples into containers to check for water now, but It’d be nice to be able to visually check the front filter, though that one is the least likely to accumulate water since everything runs through the rear/dirty tank and filter first.
20090118-gfs-kit-1

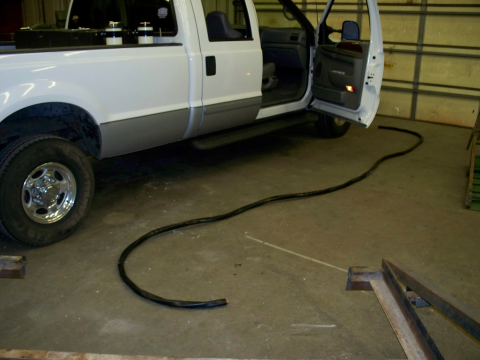
The GFS triple-bypass (3B) hose, manufactured by Parker.  UPDATE:  The Ford kit barely included enough hose.  Would have had extra if we mounted the tanks with the filters on the driver’s side, as per GFS recommendation.
20090118-gfs-kit-2

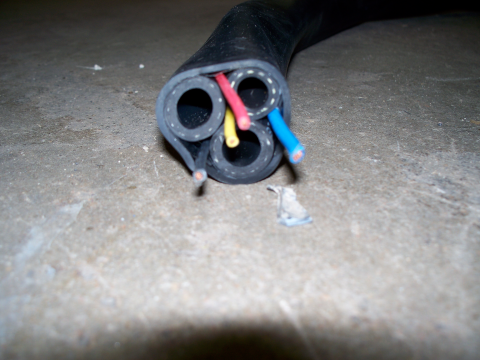
Cross-section view of the GFS triple-bypass (3B) hose.  Two 1/2″ Parker coolant hoses, one 3/8″ Parker fuel hose, 4 electrical lines for front tank fuel gauge, rear tank fuel gauge, onboard 3gpm transfer pump (from rear tank, through rear filter, to front tank), and a 10# for the pair of 300W filter heaters.  I had to use the truck frame as common ground and had to run an extra line for power to the 7gpm collection pump.
20090118-gfs-kit-3

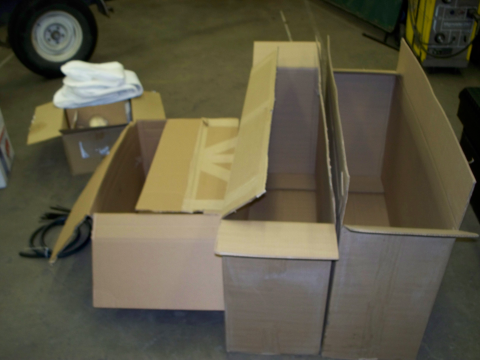
All of the GFS items (including large tanks) were well packed.  Everything I received came in 5 boxes:  front tank, rear tank, 7gpm pump (not shown), filters and gauge pod, everything else.
20090118-gfs-kit-4

Better shot of the box with filters and gauge pod.  I expected to receive an a-frame pod, but am glad I received the under dash pod since that will leave room for me to grow into some other gauges (pyro, boost, oil pressure, etc) on my a-frame down the road.
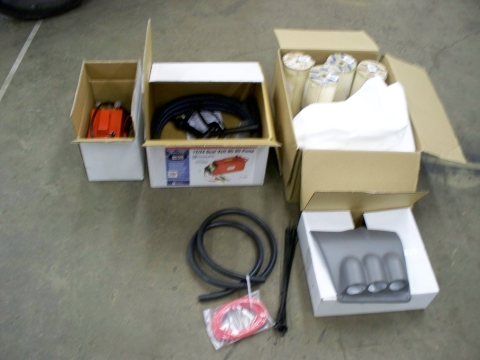
20090118-gfs-kit-5

Shot of some of the boxes received in the larger misc box.  The only documentation that I originally received was an invoice with an inventory of kit items/boxes, so I could tell that I had received everything marked on the inventory sheets but had no idea how most of it was to be installed.  I was pretty intimidated by this at first, but started to sort things out.  Things made a LOT more sense after Bud provided a copy of the GFS Ford Kit installation instructions.  Glad I asked him about instructions!
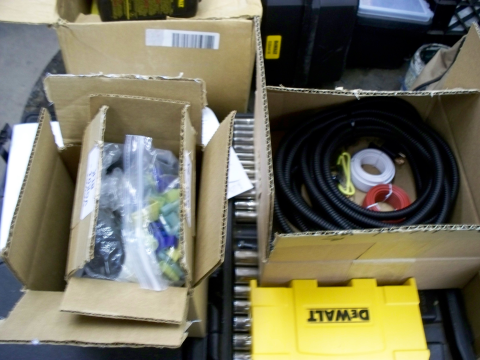
20090118-gfs-kit-6

Another shot of misc hardware that came with the kit.
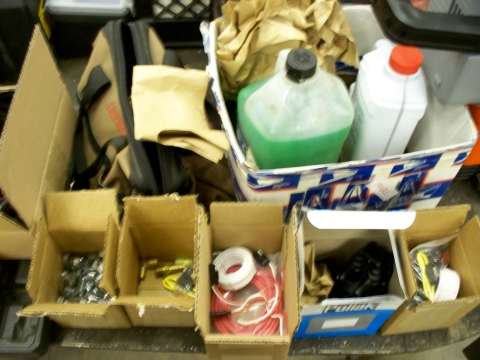
20090118-gfs-kit-7

UPDATE:  In the end, we had to buy a little extra fuel hose and a few different fittings since we mounted the tanks opposite what GFS expects.  I guess they wanted us to use the 1/2″ coolant hose with the 1/2″ fuel connectors, but I sprung for a few feet of 1/2″ fuel hose.  It seems GFS usually mounts the 3gpm pump to the out port on the Racor 1000.  That wasn’t going to work with our configuration, and seemed like a bad idea anyway.  We made a bracket so that we could mount the pump on the tanks between the filters.  We also ended up NOT using most of their electrical connectors.  In some cases we used solder and heat shrink tubing, in other cases we used our own (better) connectors and applied a drop of solder after crimping each connection.  We also mounted a 6-fuse block under the hood rather than using their in-line fuse holders.  More on this later, when I have time to describe some of the other customizations I came up with to make things more user friendly.
Ordering my WVO kit from American Green Fuels …

After about a month of trying to reach someone at GFS with questions and with my order, I finally gave up on ordering from GFS directly.  Maybe they are swamped, maybe they are on vacation, maybe their voice mail and email systems are a POS?  I’ll always wonder what the deal was.  I sent a single email request on 11/06 and left two phone messages (around 11/06 and 11/24).  I tried calling maybe 5-6 other times, but didn’t leave messages those times for fear of being tagged as high maintenance.  I just never could get in touch with anyone.  The situation is probably for the best.  By now, I’ve warmed up to WVO enough that I’ve decided to tackle the installation myself.

I ended up ordering from Bud at American Green Fuels in Houston TX (http://americangreenfuels.net/).  Bud is listed on the GFS website as an installation site and while they are not nearby either, they are probably the next closest location.  I originally called him around 4PM on 12/02 and left a VM explaining my woes trying to reach GFS and my interest in ordering a kit through Bud.  I received a callback from Bud shortly after 5PM.  He was glad to answer all of my questions.  I was able to put together an email with a draft of what I thought I’d need to order on 12/05 and he was able to respond with detailed clarifications to all of my written questions the same day.  I placed the order on 12/10 and the order was ready for pickup at GFS in Springfield MO on 12/22.

I’m back home on 12/29.  I have access to a heated shop that is closed for 3-4 more days, but I’m swamped with end of the year projects, etc. so the Golden Fuel Systems boxes are going to have to sit in my garage for a few weeks.  Here’s a summary of what I ended up ordering.

  • Golden Fuel System Kit, Ford 7.3L 99-03 Base System
  • Two (2) 60 gallon Trekker tanks (my “clean” and “dirty” tanks for collection and filtration on the road)
  • Integrated One Shot (IOS), Includes Racor 1000 w/ 1 filter element (10 micron)
  • Racor 1000 Heated Filter (for second tank) w/ 1 filter element (10 micron)
  • 7gpm Eccentric Gather Pump w/ Bracket
  • Two (2) spare Racor filter elements (2 micron)
  • Five (5) filter bags (7″ ring, 32″ length, 1 micron)

Bud was able to discount retail prices some, but this part of my WVO truck still ended up WAY over budget.  Based on amount of my driving and based on $2/gal diesel, expecting to break even on this system within 18-24 months.  That doesn’t factor in several variables against me (collection and filtering time/costs, per gallon use to sam, blending diesel with WVO, percent of time running on diesel, etc) or several variables in my favor (rising diesel prices, potential use credits from sam).  Planning to track all expenses so that I can share actual break even period, if any.  I am certain that the system isn’t doing anyone any favors while sitting in boxes in my garage.  Hoping to begin install soon.

System won’t go very far on the 5 gallon sample I have.  Need to start working on collections too.